I don’t know how many times my clients have given me administrator access to the SQL Server machine thinking I will automatically have access to administer the SQL Server. However, in SQL Server 2008 and above (i.e. SQL Server 2008 R2), there is a new security feature where the installer doesn’t automatically add the local server administrators group as SysAdmin on the server. The person doing the install has to remember to do this during setup. Most of the time, they don’t do it or forget to do it.
Take the following steps to add yourself as SysAdmin on the SQL Server to have full access:
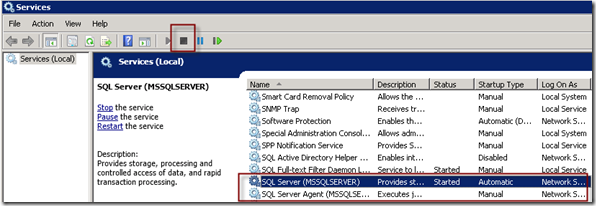
1. Stop the SQL Server instance and the SQL Server Agent service in your services (by going to administrative tools –> services or typing in services.msc from your run box)
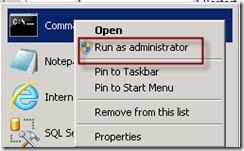
2. Open a command prompt as an Administrator
3. Locate your sqlservr.exe file (usually located in C:Program FilesMicrosoft SQL ServerMSSQL10_50.MSSQLSERVERMSSQLBinn directory) and CD to that directory:
CD C:Program FilesMicrosoft SQL ServerMSSQL10_50.MSSQLSERVERMSSQLBinn
4. Run the following command and ignore any errors that may occur during run – this starts the SQL Server Service in single user mode [1] :
sqlservr.exe -m -s MSSQLSERVER
Note: MSSQLSERVER above is the name of your instance – usually the same as the last item after the “.” in the directory path i.e. C:Program FilesMicrosoft SQL ServerMSSQL10_50.MSSQLSERVER )
5. Once that is run, check to see if the service in step 1 is activated (don’t forget to refresh the screen) and then open up SQL Server Management Studio
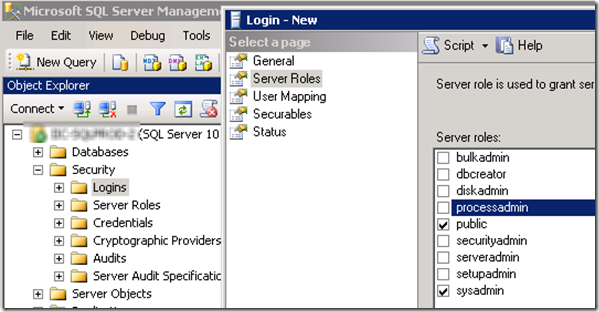
6. Once SQL Management Studio opens, go to the security tab, add your account and make them a SysAdmin
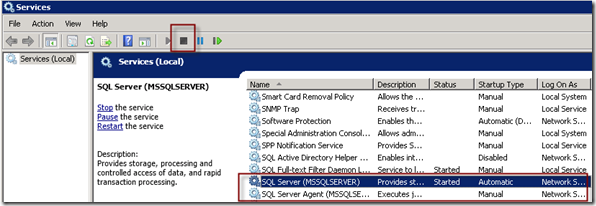
7. In your services, stop and restart the SQL Server and SQL Server Agent services


